Today, almost every business is driven dominantly by efficiency. This means businesses must find innovative and sustainable ways to maximize their output while minimizing costs as much as possible. Automation provides a powerful means to this end. Many tasks that were once manual and time-consuming can now be automated, allowing you to redirect your resources toward more strategic initiatives. One such powerful tool is Power Automate Desktop, a user-friendly automation platform designed for business users.
This guide will walk you through building a productivity-boosting bot using Power Automate Desktop. Do not worry, and you don’t need to be a tech expert to follow along. Power Automate Desktop is designed with business users in mind.
What Can You Automate With Power Automate Desktop?
Power Automate Desktop can be used to automate a wide range of tasks, including:
Data Entry and Data Extraction: You can use Power Automate Desktop to automate repetitive data entry tasks and extract information from documents or websites.
Report Generation: You can seamlessly create automated processes for generating reports and dashboards with the help of Power Automate Desktop.
Email Management: From email sorting, forwarding, and response processes, you can automate email management across its length and breadth with Power Automate Desktop.
User Interface Interaction: Power Automate Desktop can also Interact with desktop applications just like a human user, clicking, typing, and navigating.
What Can You Automate With Power Automate Desktop?
Activation: Launch Power Automate Desktop and sign in with your Microsoft or organizational accounts.
Create a New Flow
Click on “New Flow,” and we will give your flow the “Hello World” name and start building your bot.
Design the Flow
In this example, the flow should perform the following steps:
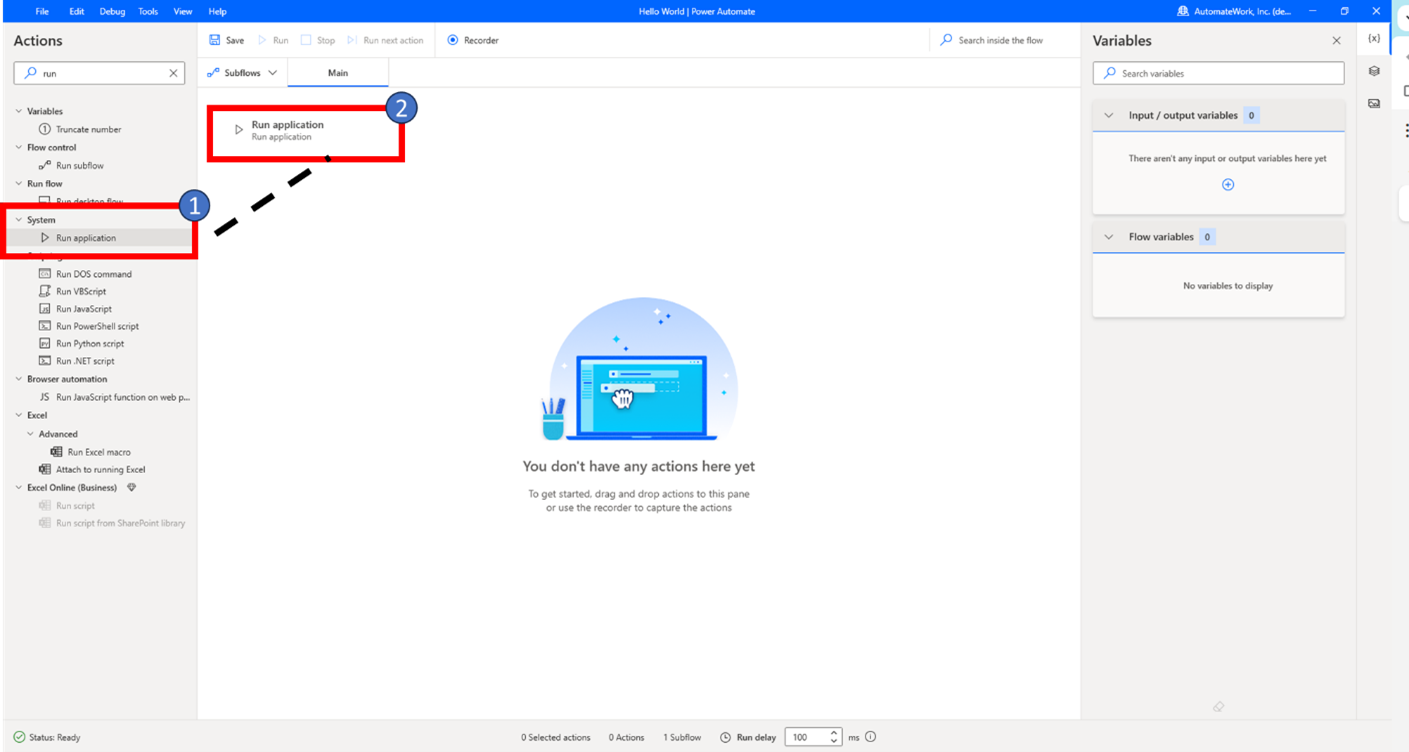
Step 1: Open Notepad
Drag and drop the “Run Application” action from the actions panel to the canvas.
Configure the action according to the below screenshot.
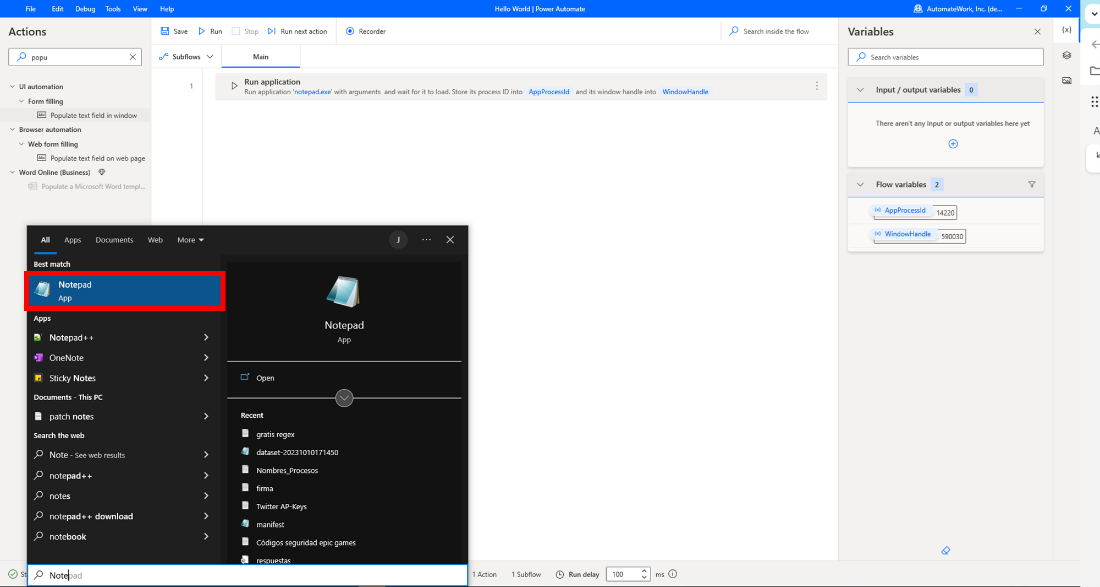
Step 2: Write the Text to the Notepad
Open a Notepad and minimize it.
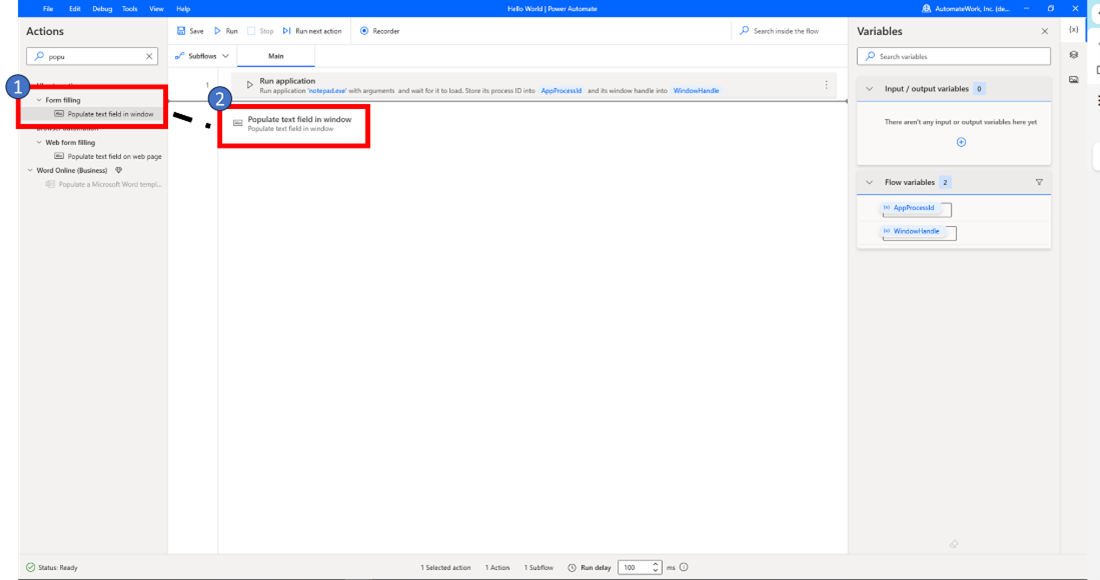
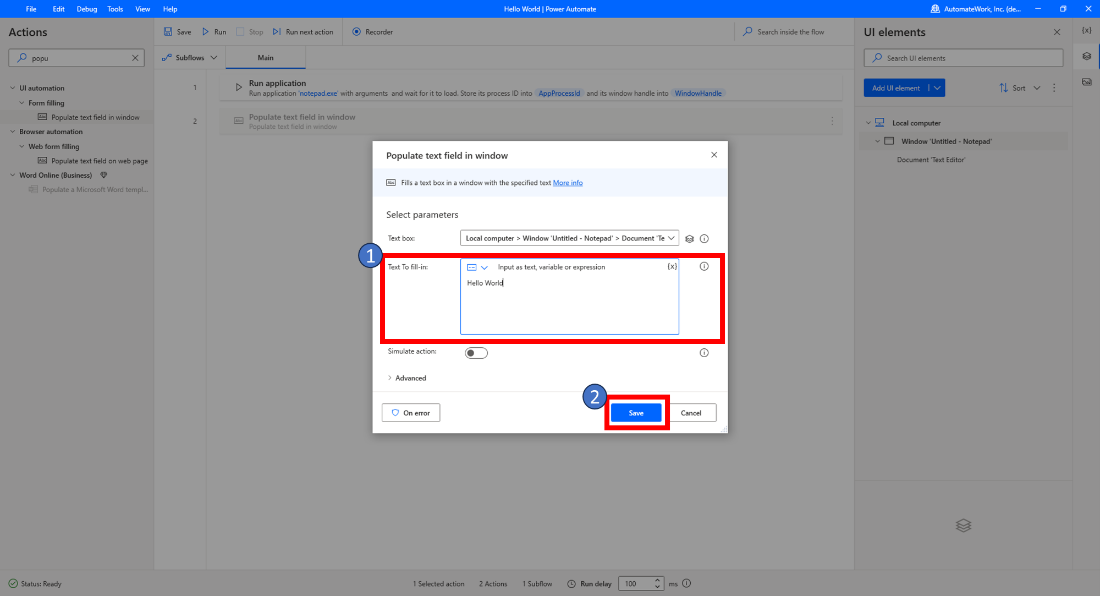
Drag and drop the “Populate text field in window” action.
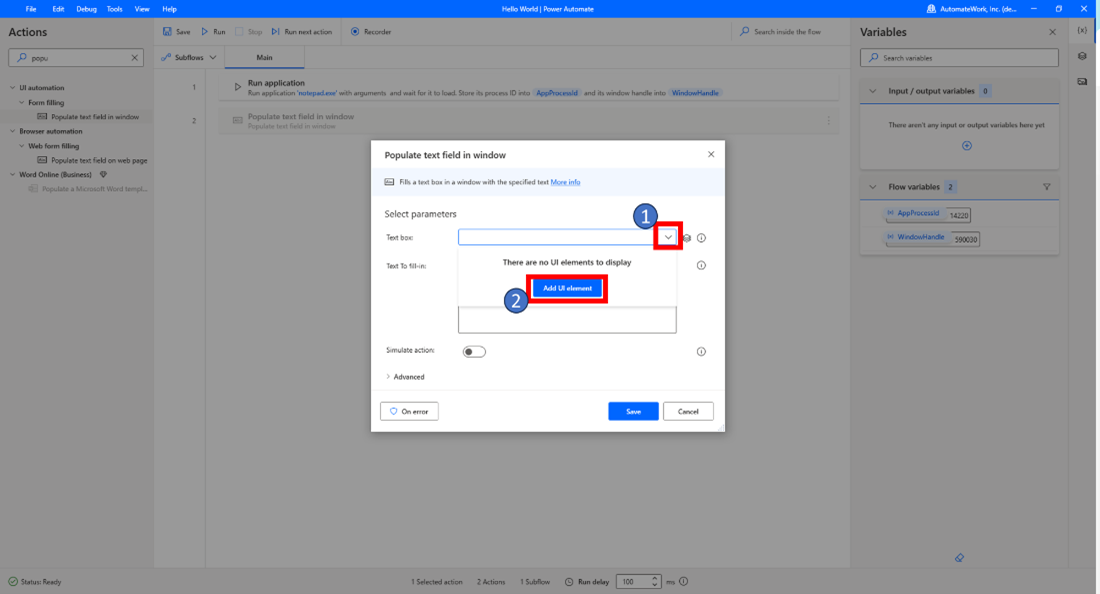
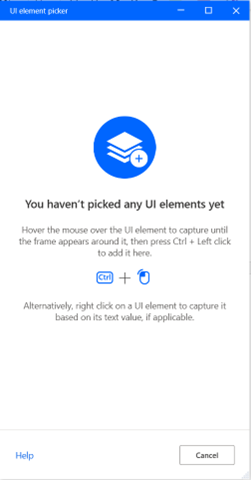
Click on the Text Box option and click Add UI Element.
This should open up the Ui Element Picker window.
In your taskbar, Maximize the previous notepad you opened in previous steps, and while pressing the CTRL key, select the blank page of the notepad to capture the UiElement.
In the “Text to fill-in,” add the text that you want to write it to the notepad and click “Save.”
Step 3: Click Save and Run
Click on the Save button to save your progress.
Click on the Run button to see your BOT in action.
Step 4: Recording and Automating Tasks
Power Automate Desktop offers two main ways to automate tasks: recording and building workflows from scratch.
Recording a Task:
01. Click on “Recording” in the Power Automate Desktop toolbar.
02. Select the application or window you want to automate.
03. Perform the actions you want to automate (e.g., filling out forms, clicking buttons).
04. Stop the recording when you’re done.
Building from Scratch:
01. Drag and drop actions from the actions panel on the left to the workflow canvas on the right.
02. Configure the actions by setting parameters and values.
Step 5: Adding Conditions and Loops
To make your bot smarter and more flexible, you can add conditions and loops to your workflow:
Else if Conditions: Use the “Else if action to create conditions based on specific criteria.
Loops: Implement “For Each” and “Loop” to iterate through lists or perform actions repeatedly.
Step 6: Debugging Your Bot
During the bot development, you can use the debugging features to test your workflow:
Step-by-Step Execution: Step through your workflow to verify each action’s behavior.
Variables and Data Watch: Inspect the values of variables and data at each step.
Step 7: Error Handling
In real-world scenarios, errors can occur. Use error-handling techniques to make your bot more robust:
On-Error: Use the “On-Error” option to catch and handle errors gracefully.
Error Logging: Log errors and exceptions for troubleshooting and analysis.
Step 8: Running and Scheduling Your Bot
Once you’ve built your bot, you can:
Run the Bot: Click the “Run” button to execute the bot on demand.
Schedule: Use a Power Automate Cloud Flow to schedule your bot to run at specific times or trigger it based on certain events.
Follow the steps and start building seamless automation from scratch today like a pro!
×
×
We use cookies to ensure that we give you the best experience on our website. We also use cookies to ensure we show you advertising that is relevant you. You can change your cookie settings at any time.